I’m just going to warn you, straight up, that this is a loooong post with a lot of pictures. But it covers something that I wanted to know how to do, and I couldn’t find a good enough tutorial on the Web so I figured it out myself by trial and error.
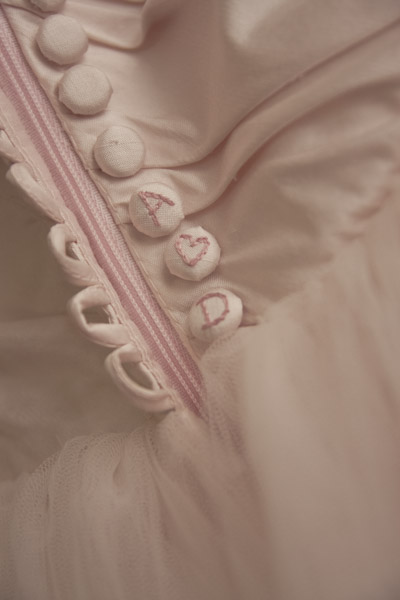
One thing I knew about my wedding dress — before I even sat down to draw, before I looked at fabric — was that it was going to have a row of tiny little buttons with loops. They’re so romantic and dreamy — and even though I wasn’t going the white wedding dress, romantic was definitely on the cards. It’s like wearing a veil: sure, I could do without it, but when else am I going to wear a dress that can legitimately require assistance just to get it done up?
The buttons needed to be about 11mm wide — that’s 7/16 of an inch to those of you over the ocean. And every time I went to cover one in the silk dupioni, said silk unraveled and puckered and was just generally dispiriting. I asked around and had a play — here is a better way.
Draw your motif on a clean sheet of paper, in black pen that can be seen through your fabric. The motif should be at least 2mm (technical term — a smidge) smaller than your button.
Cut a piece of silk three or four times the button’s size — this is not the time to be stingy with fabric.

Trace the motif ever-so-lightly with a pencil (you may need to use a lightbox or a window) and thread your needle with one strand of embroidery floss.

Of course you can use any stitch to embroider your button, but I used ol’ reliable, chain stitch. For this one, you bring your needle up, wrap the floss around the needle at the front, pull tight, and repeat (it’s easier to understand from the pictures.)


Huzzah, done! Sorry about the weird colours. My camera, it seems, cannot deal with tiny macro shots of shiny silk.

Self-cover buttons will almost always come with a cutting guide on the packet. Cut out the appropriate size and push a pin through dead centre — find it by folding the circle twice. Now rest the pin on the dead centre of your motif and push the cutting guide down.

Trace around, leaving a smidge of room because you’ll be cutting well inside the line.

Take a scrap of lightweight, iron-on interfacing and iron to the reverse side. It’s best to put a light cloth between the iron and the silk/embroidery. You don’t want to burn the silk or squash your stitching.

Now cut around your circle, inside the guide line. Thread your needle with regular cotton and make small running stitches all around it. Leave a considerable tail at either end (I could have used more in this example — at least 10cm or 4″.)

Pull tight, making sure that your motif remains centred. You may need to wrap the thread around the shank to get it tight enough. This is fiddly work. Be patient.

Place the backing on the button. Use a fingernail to make sure all the edges are sitting underneath the backing, then push down firmly all around the sides.

Congratulate yourself and take a photo!

Now go find some other places to take photos. Admire how pretty and how tiny it is.

Ahhhh.
Now you can get married!

